For some reason I lost the impetus to blog last year and there is a whole years adventures to catch up on.
Perhaps in the current lock down I will get round to it. - It was easier to keep up to date when I carried the laptop on board and could post entries during down time .. well got some down time now.
Project Noah.
What I will be doing is recording the progress of Project Noah which will, hopefully, record the building of a 4.5m kayak whilst we are unable to go sailing.
The back story is quite amusing - my wife runs a gardening business and about 12 years ago, one of hers customers offered he a plywood kayak kit. He had bought it 30 plus years ago with the intention of building it with his son. It , like many projects, never happened and in lay in his garage gathering dust.
Thinking my elder son would like to take it on she brought in home. Elder son was always going to get round to it but.... and so it sat in our garage for 12 years or so.
A lock down tidy up brought it into the open and all the piece's were accounted for, save the glue which was a solid mass in its tin after all these years.
And so Project Noah was born.
Amazon and E bay provided a source of Wests Epoxy, mixing pots and all the necessary bits and bobs and so I started ..yesterday (Saturday 25th April)
First the workshop - at 4.5m the garage which is in everyday use is not an option
The office has a son working from home installed in it, together with a drum kits and other paraphernalia, so out came the very rarely used marque/gazebo that last saw action at Drascamp in 2016.
Once the 'double glazing' was installed I was ready to go.
I laid out the kit - and set up an epoxy work station to try and keep things tidy....well to start with anyway.
Sunday 26th AprilTime ran out yesterday so today saw the first joints started - combining the four panels that may up the lower half of the hull into their respective 4.5m lengths. - I sanded the edges and put a slight chamfer on the edges to be bonded.
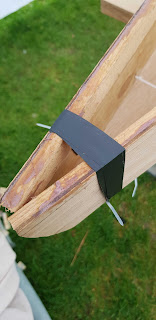
I also prepared and bonded the runners that give strength to the inwhales joint with the upper deck, using a thickened epoxy mix once the initial wetting coat of normal epoxy had gone tacky. - Clamps secured the joints and all I can do is wait for it to go off.
Hopefully later today I can carefully turn the panels over and bond the other side - giving a good joint so i can move on to the other panels that need to be joined before stitch and glue comes into operation to put it all together.


